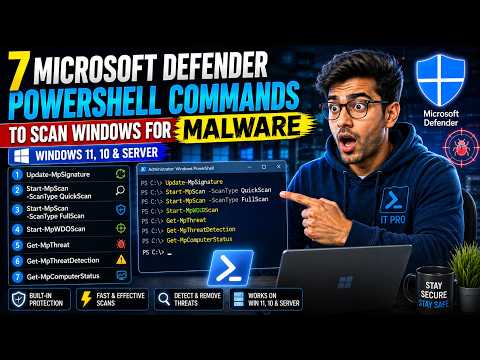
7 PowerShell Commands to Scan Windows for Malware
Learn how to update Microsoft Defender, run Quick, Full and Offline malware scans, review threat detections and verify protection status using built-in Windows PowerShell commands.
Supported Windows versions
- Windows 11
- Windows 10
- Windows Server 2019
Microsoft Defender Antivirus must be installed and enabled. Some commands may not work when Defender is disabled by organizational policy or replaced by third-party antivirus software.
1. Update Microsoft Defender signatures
Download the newest Microsoft Defender security-intelligence definitions before starting the malware scan.
2. Run a Quick Scan
Scan active processes and common Windows locations where malware is frequently found.
3. Run a Full Scan
Scan files and supported storage locations. A Full Scan may take a long time depending on the amount of data stored on the computer.
4. Start Microsoft Defender Offline Scan
Save your work before running this command. Windows will restart and perform the Defender Offline Scan outside the normal Windows session.
5. Check detected threats
Display known Microsoft Defender threat records stored on the computer.
6. View threat-detection details
Display detailed information about Microsoft Defender detections, affected resources and remediation activity.
7. Check Microsoft Defender status
Review Microsoft Defender engine versions, signature status, real-time protection, scan information and other security settings.
Important notes
Open PowerShell using Run as administrator before executing these commands. An empty result from a threat command may mean that no matching active or historical threat record was returned.
PowerShell scan results should be interpreted together with Windows Security → Virus & threat protection → Protection history .
Watch the complete tutorial on YouTube